I was suppose to post this on Tuesday however I have been fairly busy this week so I have only just had time to finish writing! Sorry!
Today I am 24! It is my first birthday in Germany which has been quite exicting. I have spent the morning at School (eating lots of After Eight chocolates!) and discussing whose resonsibility it is to do the house work… quite a heated debate!
On Saturday we are going out for dinner to one of our favourite cafes, which is just across the border in France. I still find it odd saying “we are just going to France for the afternoon”. 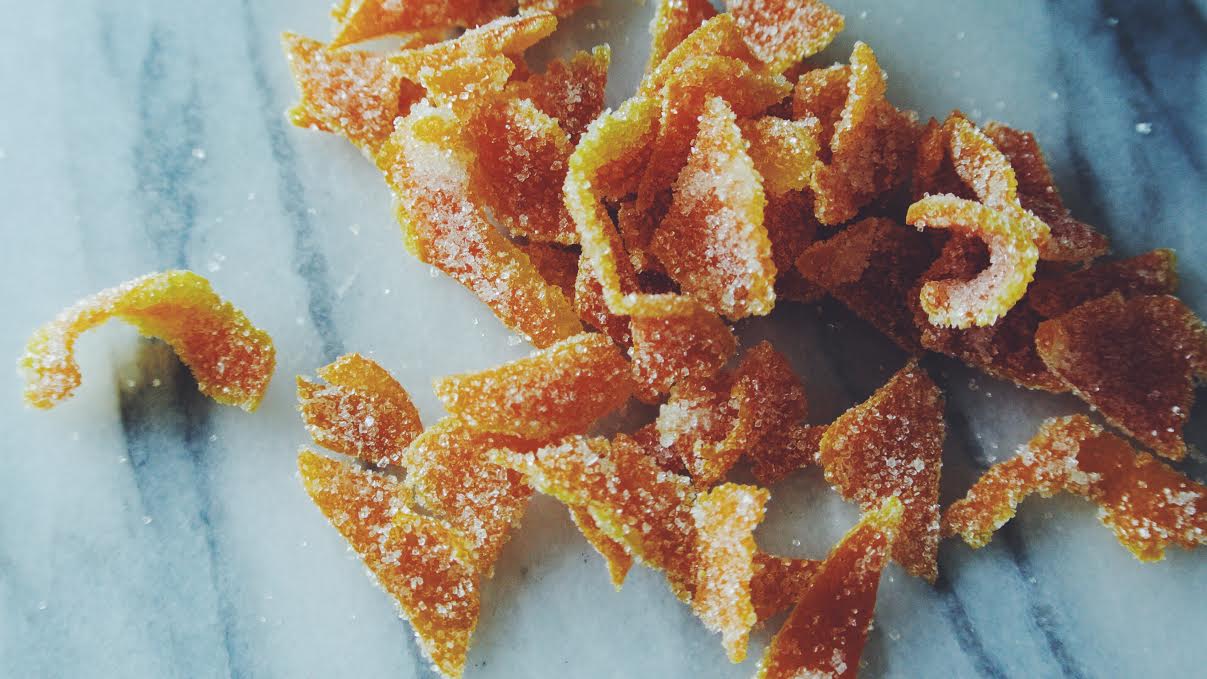 Tim is currently making me a lovely dinner of homemade pasta (his speciality), courgette, peas and smoked salmon! I have also been very lucky and have been given 3 new baking books for my birthday; Lucy Bakes by Lucy Cuffin (I think my Mum saw the name and ran with it! It looks like a great book though!), Life is Sweet by the Hummingbird Bakery from my lovely sister-in-law and Backen by Parragon from a friend at school. Tim also bought me a yoga mat so now I have no excuse! To make the day even better it has been 31°C!
  Tim and I made a Chocolate Orange Cake for my birthday too! It is really light and delicious. We even had a go at making crystalised orange peel to go on top. If you would like the recipe have a look below!
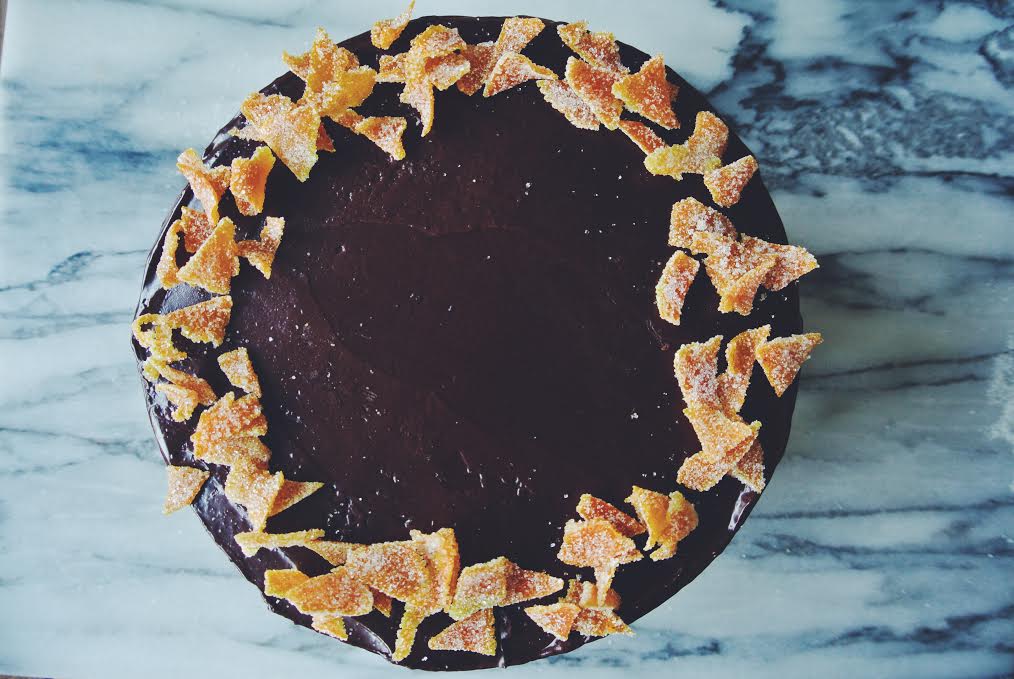
For my birthday I would love it if you could pop over and give Lucya Bakes a like on Facebook and Instagram!
Lucya
 24 Chocolate Orange Birthday Cake
Ingredients
Sponges
400g plain flour
450g caster sugar
4 tsp baking powder
60g cocoa powder
250g butter, softened
6 eggs
320ml buttermilk + 20ml extra
juice of 2 oranges
Ganache
400g Chocolate (I used 3/4 dark chocolate and 1/4 milk chocolate)
400ml double cream
zest of 1 orange
Crystalised Orange Peel
2 Oranges
100ml Water
150g Sugar
Caster sugar for dusting
Note: you can make the crystalised orange a few days before and keep in an air tight container
Method Start off by making the crysalised orange…
Wash your oranges thoroughly. Using a vegetable peeler, peel the skin of the orange in to strips (you don’t want to peel the white bit of the orange as this will make it taste bitter)
Put your strips of peel in to a small saucepan and cover with cold water.
Bring the water to a boil then drain, cover with cold water and repeat once more.
Put the 100ml water and 150ml of sugar in to a small saucepan and wait for the sugar to melt.
Once the sugar has melted add your orange strips. Wait until the peel has turned translucent.
Using a slotted spoon remove the peel from the sugar syrup and place of a cooling rack to dry (make sure you have something covering the work surface so it doesn’t get covered in sticky sugar syrup! I used a piece of baking paper).
Leave to dry for around 1 hour.
When the peel is slightly sticky to touch, pour some caster sugar in to a bowl, cut your peel to the desirable size and add to the bowl.
Mix until the peel is completely covered in sugar.
Store in an air tight container until needed.
…Next make the sponge…
Preheat your oven to 170c (fan-assisted) and line and grease two 18cm cake tins.
Beat together the butter and sugar until light and fluffy.
Add the eggs one by one, beating well inbetween.
Stir in the buttermilk.
Sieve the flour and baking powder in to the bowl and gently fold together.
Evenly divide the mixture between two bowls.
In the first bowl sieve the cocoa powder and add the extra 20ml of buttermilk.
Gently stir until the mixture is smooth and well combined.
Pour in to one of your prepared baking tins.
In the second bowl add the orange juice and gently stir until smooth and well combined.
Pour into the other prepared cake tin.
Bake in your preheated oven for around 20 minutes or until a skewer inserted in to the middle comes out clean.
Allow to cool in the tin for 10 minutes before turning the sponge on to a cooling rack and leaving to cool completely.
Once completely cool, level and split your cakes.
You need two layers of orange sponge and two layers of chocolate sponge.
…then make your chocolate ganache…
In a clean bowl, break 300g of chocolate in to small pieces.
Put 300ml of cream in to a saucepan over a medium heat, allow the cream to simmer for 1 minute before taking off the heat and allowing to cool for another minute.
Pour the cream on to the chocolate and using a whisk stir quickly until it is a smooth, even consistancy.
Add the orange zest and mix until it is evenly distributed through the ganache.
Allow to cool in the bowl to a spreading consistancy. (If it is to fluid when you try and build your cake it will just all ooze out of the sides!)
… constructing the cake
All of your layers of cake need to have flat even tops and bottoms, the best way to do this is with a serated knife.
Start by putting a chocolate layer on a plate or cake board.
Divide your chocolate ganche in to four. I find the easiest way to do this is to draw a cross through it while it is still in the bowl.
Spoon out one of the quaters and place on your chocolate sponge.
Spread the ganache so it goes right to the edge of the sponge and is an even layer.
Add an orange sponge and repeat the process above with the ganache.
Keep repeating until you have all of the sponge layers in place.
With the last quater of ganache, spread evenly over the sides and top of the cake making it as smooth possible.
Place in the fridge and allow the ganache to set.
Once the ganache has set and your cake is more stable, take it out of the fridge.
If you have any unwanted lumps of ganache you can easily get rid of these by running hot water over a palet knife, drying it with a tea towel and then smoothing the lump. The knife should be just hot enough to melt the surface of the ganache.
With the 100ml of cream and 100g of chocolate you have left over, make a small amount of ganache using the same method as before.
Allow this new batch of ganache to cool to a pouring consistancy.
Transfer your cake to a wire rack, place a plate or a sheet of grease proof paper on your kitchen surface to protect it.
Pour the new batch of ganche on to the top of the cake in the middle.
Using a palate knife, work the ganache to the edge of the cake and down the sides, making sure the whole cake is covered. Once you are happy that the cake is completely covered with a second layer of ganche and there are as few marks in it as possible leave the cake to set.
Finally to finish, decorate with your crystalised orange pieces. 

Oh my, that looks so good! Love the decoration aswell, really effective!
Thank you! I was really pleased with how it turned out! The crystalised orange pieces were really easy too!
The cake looks fabulous… and happy belated birthday 🙂 xx
Thank you very much 🙂 it was delicious! Xx
WOW!! this looks incredible! Chocolate with orange is one of my favourite flavour combinations so I am defiantly going to have to try this out soon. The crystallised orange is a beautiful touch and the overall presentation is lovely.
I just need to wait for the next birthday to pop up and this is being made
Thank you so much! It is one of my favourite flavours too! Please let me know if you make it, I would love to see a picture!